
Choosing the Right Coloring Medium: Tips for Using Colored Pencils, Markers, and More
Share
When it comes to adult coloring, the medium you choose can significantly impact your overall experience and the final look of your artwork. With so many options available—from colored pencils to markers and beyond—it can be challenging to know which medium is best suited for your project. In this blog post, we'll explore the most popular coloring mediums, discuss their pros and cons, and provide tips to help you make the right choice for your coloring style. Whether you're new to coloring or a seasoned artist, this guide will help you elevate your creative journey.
1. Colored Pencils: Versatility and Control
Pros:
- Precision and Control: Colored pencils offer excellent control, making them ideal for intricate designs and detailed work. You can easily adjust the pressure to create light or dark shades, giving you the flexibility to blend and layer colors.
- Wide Range of Colors: Colored pencils come in an extensive array of colors, allowing you to find the perfect shade for your project. They also blend well, enabling you to create custom hues and gradients.
- Portable: Compact and easy to carry, colored pencils are a convenient option for coloring on the go.
Cons:
- Time-Consuming: Because colored pencils require building up layers to achieve rich color, they can be more time-consuming than other mediums.
- Limited Coverage: Filling large areas with colored pencils can be tedious, as it takes longer to achieve even coverage compared to markers or pastels.
Tips for Using Colored Pencils:
- Invest in Quality: Higher-quality colored pencils, such as Prismacolor or Faber-Castell, offer smoother application and richer pigments, making your coloring experience more enjoyable.
- Experiment with Blending Tools: Use blending tools like tortillons, blending stumps, or even a soft brush to create smooth transitions between colors.
- Layering and Shading: Build up layers gradually to achieve depth and dimension. Start with light pressure and add more layers to darken the color as needed.
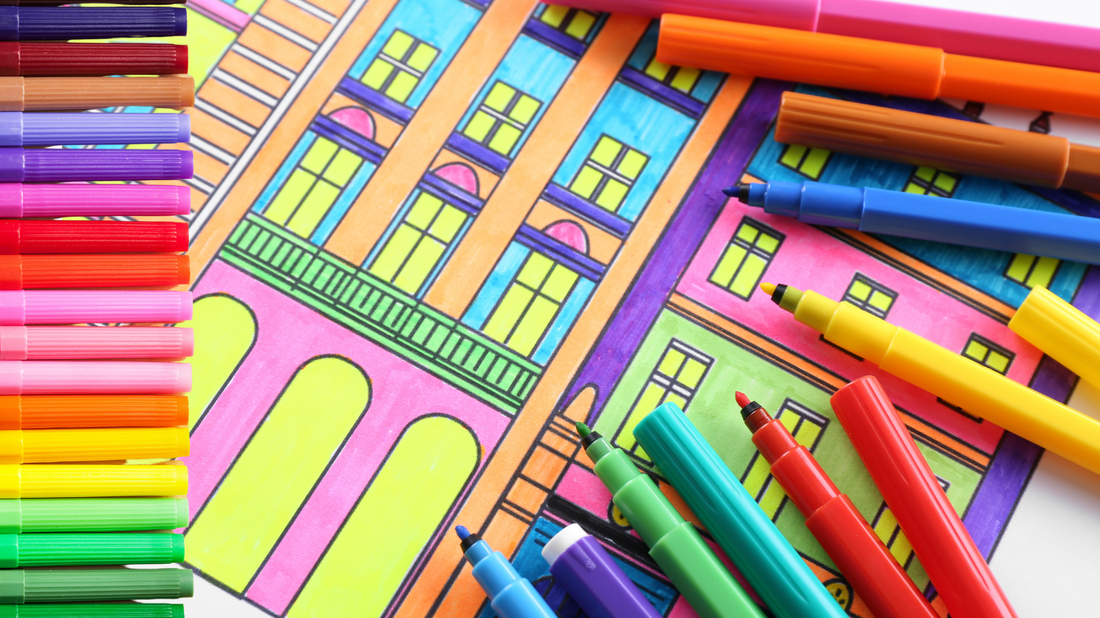
2. Markers: Bold and Vibrant Colors
Pros:
- Vibrant and Bold Colors: Markers provide rich, vibrant colors that can make your artwork pop. They're perfect for creating eye-catching designs with strong contrast.
- Quick Coverage: Markers are ideal for covering large areas quickly and evenly, making them a great choice for bold patterns and expansive backgrounds.
- Variety of Tip Styles: Markers come in different tip styles, such as fine, chisel, and brush tips, offering versatility in line thickness and texture.
Cons:
- Bleed-Through: One of the biggest challenges with markers is bleed-through, especially when using alcohol-based markers. This can limit your ability to color on both sides of the paper.
- Limited Blending: While some markers blend well, such as alcohol-based ones, others may not blend as smoothly as colored pencils or pastels.
Tips for Using Markers:
- Use the Right Paper: To prevent bleed-through, choose thick, high-quality paper designed for marker use. Consider using a protective sheet underneath your coloring page.
- Blend with Alcohol-Based Markers: If you enjoy blending, opt for alcohol-based markers like Copic or Spectrum Noir. They allow for smoother transitions between colors and can be layered for added depth.
- Practice Control: Markers can be unforgiving, so practice applying consistent pressure and control to avoid streaks and uneven coverage.
3. Gel Pens: Fine Details and Metallic Finishes
Pros:
- Precision: Gel pens are perfect for adding fine details, outlines, and accents to your coloring pages. They offer excellent precision and control for intricate designs.
- Variety of Finishes: Gel pens come in a range of finishes, including metallic, glitter, and pastel, allowing you to add unique touches to your artwork.
- Smooth Application: Gel pens glide smoothly across the paper, making them a pleasure to use for detailed work.
Cons:
- Limited Coverage: Gel pens are best suited for small areas and accents rather than filling large spaces.
- Ink Flow: Some gel pens may have inconsistent ink flow, leading to skipping or smudging if not handled carefully.
Tips for Using Gel Pens:
- Use for Highlights and Accents: Gel pens are ideal for adding highlights, outlines, and decorative elements to your coloring pages. Use them sparingly to enhance your designs.
- Store Properly: Store gel pens horizontally to ensure even ink flow and prevent them from drying out.
- Combine with Other Mediums: Pair gel pens with colored pencils or markers to create layered effects and add a touch of sparkle or shine to your work.
4. Watercolor Pencils: A Blend of Drawing and Painting
Pros:
- Versatility: Watercolor pencils offer the best of both worlds—they can be used dry like regular colored pencils or activated with water to create a watercolor effect.
- Soft Blending: When water is applied, watercolor pencils blend beautifully, creating soft gradients and smooth transitions between colors.
- Expressive: Watercolor pencils allow for a more painterly approach, giving your artwork a fluid and expressive quality.
Cons:
- Requires Water and Brushes: To achieve the full effect of watercolor pencils, you'll need water and brushes, making it a slightly more involved process.
- Paper Sensitivity: Watercolor pencils work best on watercolor paper or thick mixed-media paper to prevent warping and bleeding.
Tips for Using Watercolor Pencils:
- Start Light: Apply light layers of color and gradually build up intensity before adding water. Once activated, the colors will become more vibrant.
- Control Water Amount: Use a small amount of water for precise control, or more water for a looser, more fluid effect. Experiment with different brushes to see what works best for your style.
- Experiment with Techniques: Try different techniques, such as wet-on-dry (applying water after coloring) and wet-on-wet (wetting the paper before coloring) to achieve various effects.
5. Pastels: Soft and Dreamy Effects
Pros:
- Soft and Smooth Application: Pastels provide a smooth, velvety texture that's perfect for creating soft gradients and dreamy effects.
- Blending Capability: Pastels are known for their blending capabilities, allowing you to create seamless transitions and unique color combinations.
- Expressive: Pastels are ideal for expressive, loose coloring, giving your artwork a softer, more ethereal quality.
Cons:
- Messy: Pastels can be messy to work with, as the powdery residue can get on your hands and surrounding surfaces.
- Fragile: Pastels are more fragile than other mediums and can break easily if not handled with care.
Tips for Using Pastels:
- Use Fixative: To prevent smudging and preserve your artwork, use a fixative spray after completing your pastel coloring.
- Blend with Fingers or Tools: Pastels can be blended with your fingers, cotton swabs, or blending tools for a smooth, seamless finish.
- Work on Textured Paper: Pastels work best on textured paper that can grip the pigment, such as pastel paper or sanded paper.
Conclusion: Finding the Right Medium for You
Choosing the right coloring medium ultimately comes down to your personal preferences and the type of artwork you enjoy creating. Whether you prefer the precision of colored pencils, the boldness of markers, or the softness of pastels, each medium offers unique advantages that can enhance your coloring experience. Don’t be afraid to experiment with different mediums to discover what works best for you.
At Artistic Coloring Books, we’re passionate about helping you achieve your creative potential. Explore our wide range of adult coloring books designed for various mediums, and find the perfect book to pair with your favorite coloring tools. Whether you’re looking to relax, express yourself, or simply enjoy the art of coloring, we’ve got you covered.